|
|

楼主 |
发表于 2009-11-28 21:23:25
|
显示全部楼层
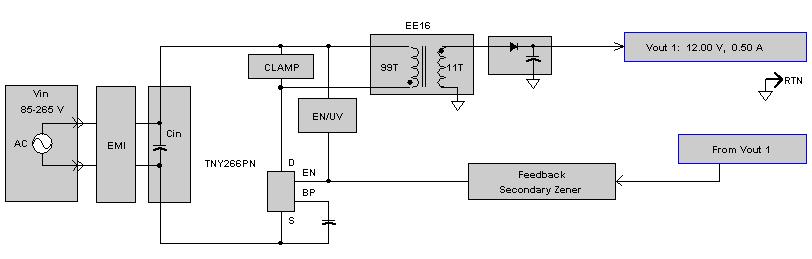
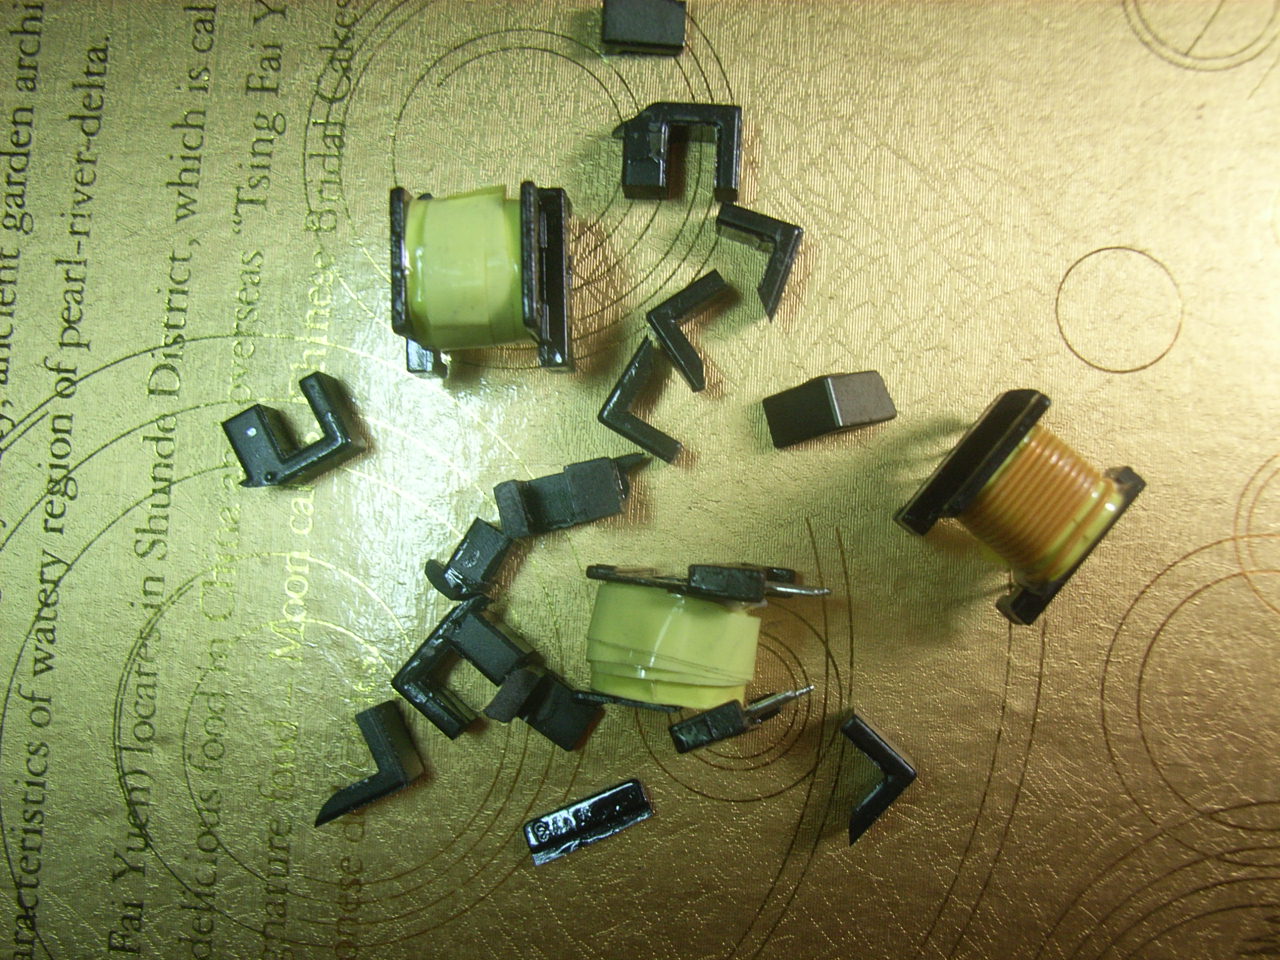
继续玩,继续测试中:
在Switch.c的main函数中加入如下代码:
printf("\r\n Switch控制程序 ");
printf("\r\n HWJ 20091127 ");
printf("\r\n Ver%d ",VerConst);
在Switch.h中加入:
#define VerConst 1001
编译、下载,连接好串口线,运行后就可以通过电脑看到打印信息了:
Switch控制程序
HWJ 20091127
Ver1001
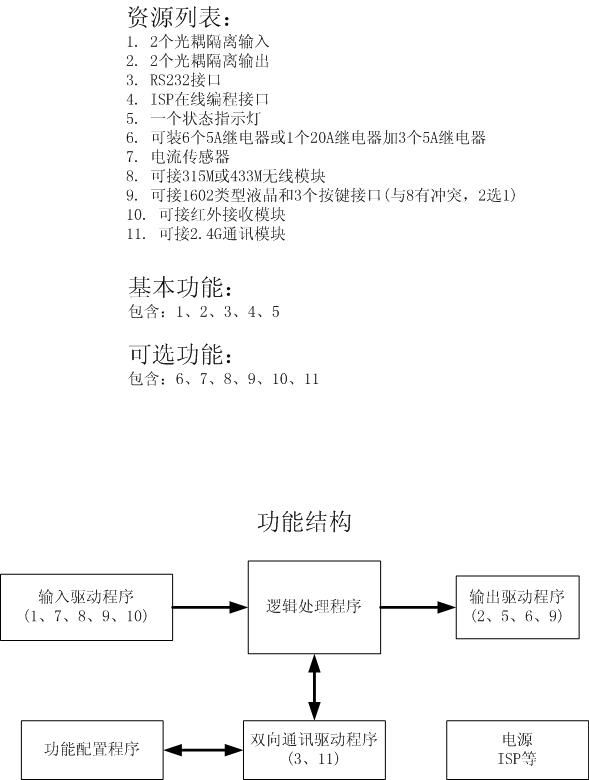
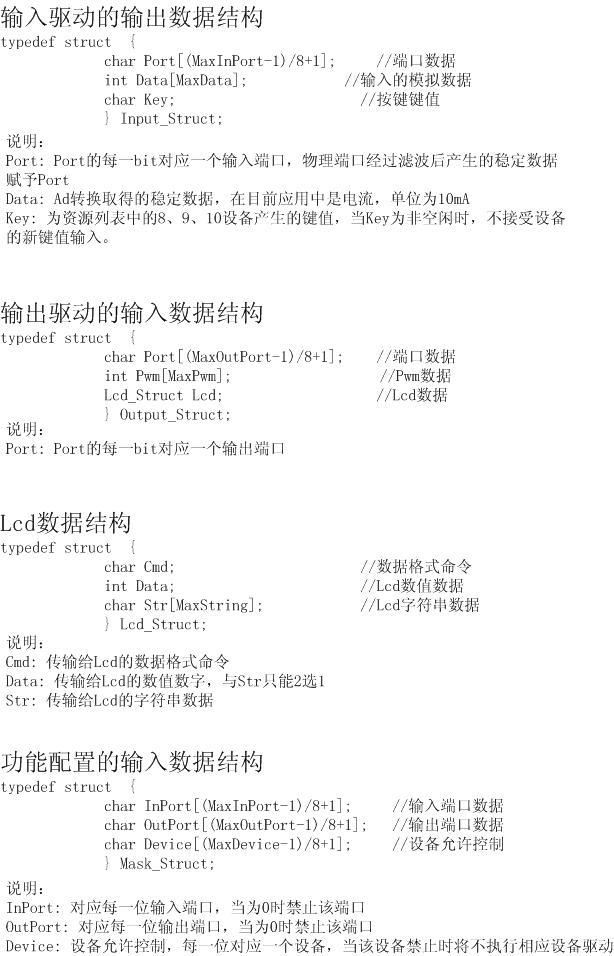
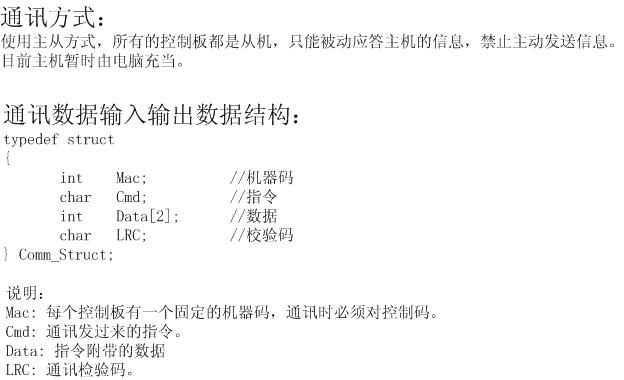
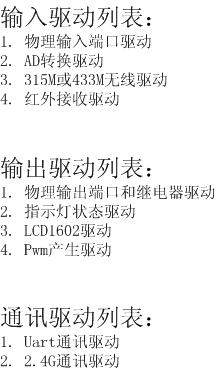
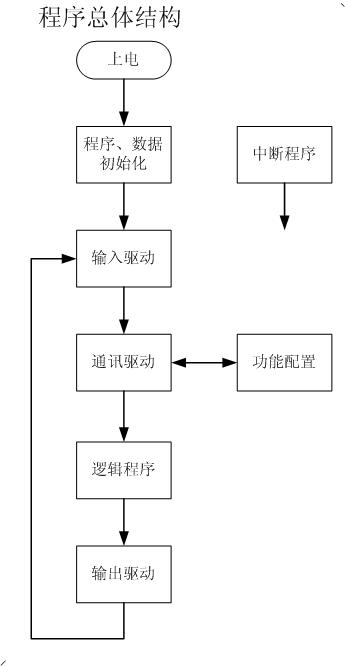
将前面准备的结构分别在Input.h、Output.h、Config.h等头文件中定义好,同时定义好相应的具体参数和位置,
就可以写输入输出的驱动了:
输入驱动,很简单,扩展端口也很方便的:
void FunInput(void)
{
if (CheckDev(DevInPort) == Enable)
{ //如果设备允许则进入
FunPortIn();
}
}
//端口函数,每4mS扫描一次端口并处理
void FunPortIn(void)
{
static U8 Time1mS;
static U8 TimeS;
#ifdef DebugPortIn
U8 DbIndex;
#endif
if (Time1mS == Time.T1mS) return;
Time1mS = Time.T1mS;
#ifdef DebugPortIn
if (TimeS++ < 250) return; //调试时改为每250mS扫描一次,方便打印数据观察
#else
if (TimeS++ < 4) return; //每4mS扫描一次
#endif
TimeS = 0;
PortScan();
PortFilter();
//InAnalyse();
#ifdef DebugPortIn
printf("\r\nInput.Port[0]=%x ;",Input.Port[0]);
printf("In.Port[0]=%x ;",In.Port[0]);
printf("Input.Filter=");
for (DbIndex=0; DbIndex<MaxInPort; DbIndex++)
{
printf("%d; ",Input.Filter[DbIndex]);
}
#endif
}
//读入端口数据,如果该端口禁止则固定为0
void PortScan(void)
{
if ((InPort0 == LevelLow) && (CheckInPort(In0) == Enable)) //In0
{
SetBit(Input.Port[In0/8],In0);
}
else
{
ClrBit(Input.Port[In0/8],In0);
}
if ((InPort1 == LevelLow) && (CheckInPort(In1) == Enable)) //In1
{
SetBit(Input.Port[In1/8],In1);
}
else
{
ClrBit(Input.Port[In1/8],In1);
}
}
//端口防抖动,采用的方法是:0的机会多就按0处理,1的机会多就按1处理,跟通常的防抖不一样。
void PortFilter(void)
{
U8 Index;
for (Index=0; Index<MaxInPort; Index++)
{
if (Input.Port[(Index/8)] & (0x01<<(Index%8)))
{
if (++Input.Filter[Index] >= Input.SetFilter[Index])
{
SetBit(In.Port[Index/8],Index); //输出1
Input.Filter[Index] = 0;
}
}
else
{
if (-(--Input.Filter[Index]) >= Input.SetFilter[Index])
{
ClrBit(In.Port[Index/8],Index); //输出0
Input.Filter[Index] = 0;
}
}
}
}
输出驱动和配置程序就不贴了,想看的自己下程序看吧,
写好了驱动,就可以写逻辑程序了:
void FunLogic(void)
{
//测试一下,闪罫ed灯,就按闪2次灭1次吧
Out.Led = LedFlash2; //就这一句就可以了
//在测试一下输入端口和输出端口和继电吧
//假定输入In0有信号则20A继电器ORL3动作
if (InputPort(In0) == Enable)
{
SetPort(ORL3);
}
else
{
ClrPort(ORL3);
}
//假定输入In1有信号则继电器ORL6和Out1错开动作
if (InputPort(In1) == Enable)
{
ClrPort(ORL6);
SetPort(Out1);
}
else
{
SetPort(ORL6);
ClrPort(Out1);
}
}
下载后就可以看到Led灯和继电器的相应动作了,
到目前为止的测试代码:
测试Led、输入、输出和继电器ourdev_508567.rar(文件大小:91K) (原文件名:Switch20091128.rar) |
|


 发表于 2009-10-30 21:41:10