|
|
用洞洞板做的m8电感电容电解电容表
本仪表是基于
http://www.ourdev.cn/bbs/bbs_content.jsp?bbs_sn=3279392&bbs_page_no=1&search_mode=1&search_text=电感&bbs_id=9999
上jun427,的m8电感电容电解电容表经修改而成,感谢jun427兄的无私分享。
在原电路的基础上,去掉了2个继电器,换成2个带锁的轻触开关,只用了一个云母电容。
加入了Uc=0.632E的校验指示(同时按下S1、S2、S3开机),Vt0是与646.6593317(646.6593317/1023=1-e^(-1))的差距,Vt1是经换算后与1-e^(-1)=0.632…的差距,调节电位计数越接近0就越精确。
若按下S1后开机进入电解电容测量,此时是小电容(1uf-500uf)档,断开S1为测大电解(500uf以上),实际使用时2档均可测大小电容(相差不大),不过选择合适的档位会更准确。若在S1断开的情况下按下S2和S3就可进入电感,电容的测量。
若断开S1后开机则进入电感,电容的测量,先是校准,按下S2,断开S3测F0,然后按下S3测F1(注:按错S2,S3的状态会有提示,按提示做就行了),完成校准,进入电容测量(S2闭合着),此时测量是带标准电容的测量,断开S3可断开标准电容,2种测量均可,误差不大。断开S2进入电感测量,同样通过开合S3可接入或断开标准电容。若测量过程中按下S1则进入电解电容测量。
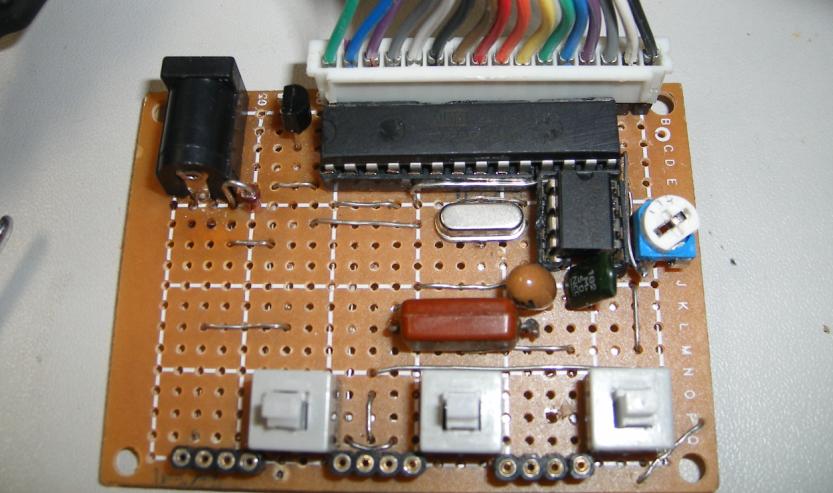
(原文件名:1.JPG)
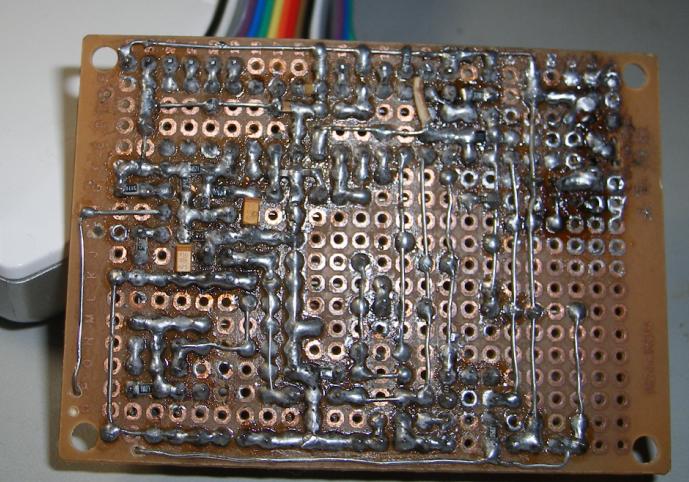
(原文件名:2.JPG)
电解电容测试点校准
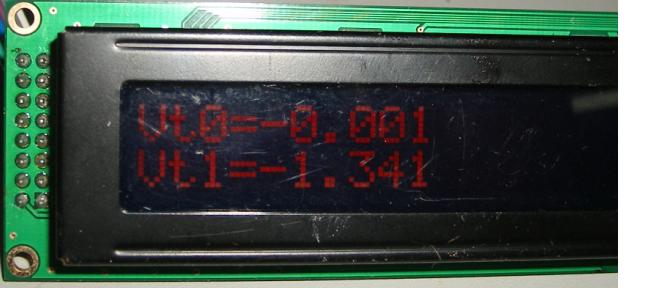
(原文件名:3.JPG)
测1uh电感,很准的哦!
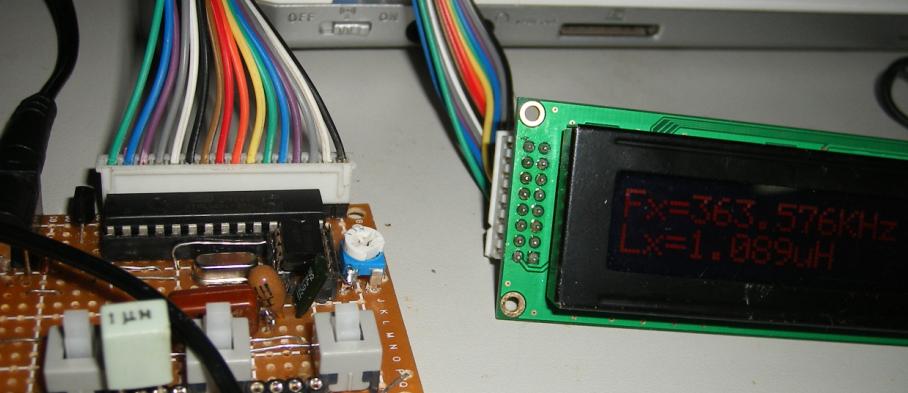
(原文件名:4.JPG)
测6pf的瓷片,也不错!
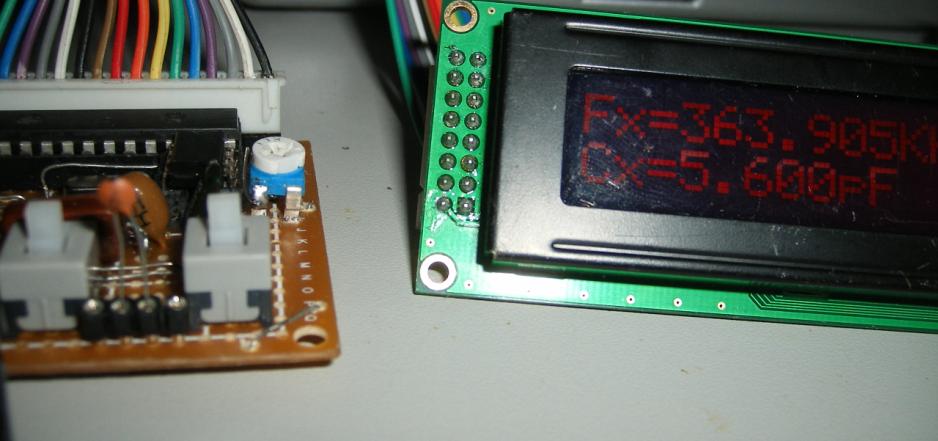
(原文件名:5.JPG)
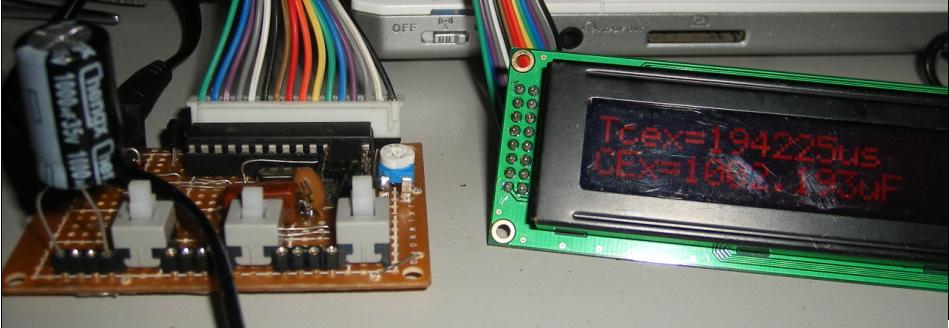
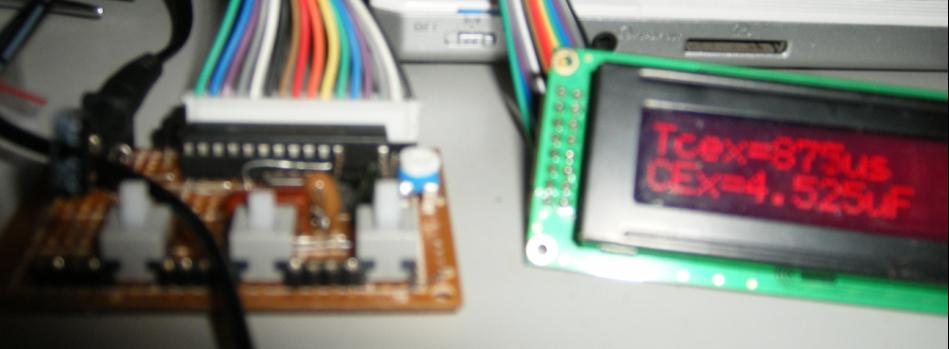
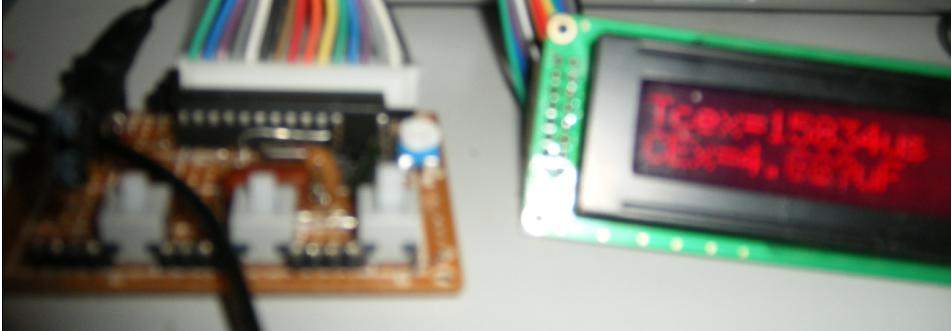
分别用2档测1000uf和4.7uf电解
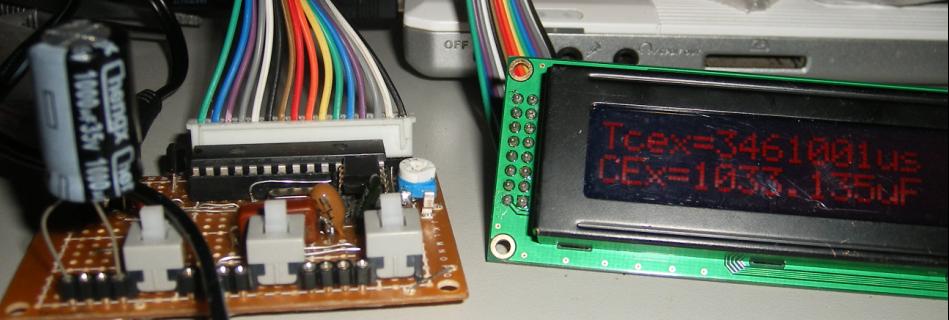
(原文件名:6.JPG)
(原文件名:7.JPG)
(原文件名:8.JPG)
(原文件名:9.JPG)
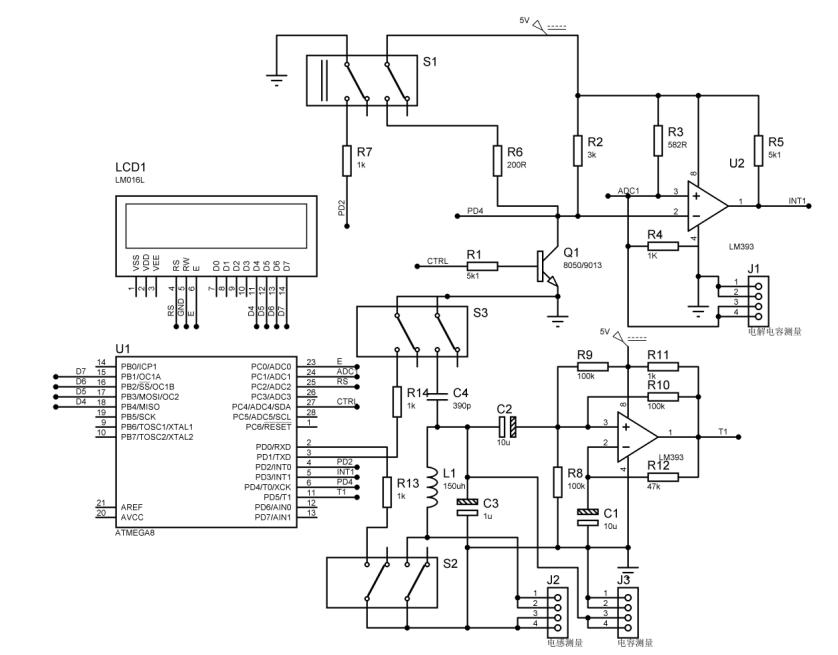
电路图如下,忽略了m8最小系统,请自己添上,AVCC5V、AREF对地电容别忘了,R3实为1k电位计。
(原文件名:ssssss.JPG)
源码如下:
'****************************************************
'* 电感电容电解电容测量仪 *
'* BASCOM-AVR1.11.8.5 *
'* 魏为 于东北大学 *
'* weiweitm@126.com *
'* 20100312整理 *
'****************************************************
$regfile = "m8def.dat"
$crystal = 8000000
Config Lcdpin = Pin , Db4 = Portb.4 , Db5 = Portb.3 , Db6 = Portb.2 , Db7 = Portb.1 , Rs = Portc.2 , E = Portc.0
Config Lcd = 16 * 2
Config Timer0 = Timer , Prescale = 256
Config Timer1 = Counter , Edge = Falling
Config Timer2 = Timer , Prescale = 8
Config Adc = Single , Prescaler = Auto , Reference = Avcc
Config Int1 = Falling
Ddrd.0 = 0
Ddrd.1 = 0
Ddrd.2 = 0
Ddrd.4 = 0
Ddrc.1 = 0
Portc.1 = 0
Portd.0 = 1
Portd.1 = 1
Portd.2 = 1
Portd.4 = 0
Ddrc.4 = 1
Portc.4 = 1
Dim Ifready As Bit , Firstrunce As Bit , Firstruncl As Bit
Dim Ct As Long , Cct As Long
Dim Clx As Single
Dim C0 As Single
Dim L0 As Single
Dim Strclx As String * 15
Dim W As Word , S As Single
Dim T0 As Byte , T1 As Byte
Dim Lf As Byte
Dim F As Long
Dim F0 As Long
Dim F1 As Long
Dim F2 As Long
Dim Ftemp As Long
Dim Strf As String * 9
Enable Interrupts
On Int1 In1:
On Ovf0 Over0:
On Ovf1 Over1:
On Ovf2 Over2:
Ifready = 1
Firstrunce = 1
Firstruncl = 1
Locate 1 , 1
Cursor Off
Lcd "Welcome to this"
Lowerline
Lcd "L-C-CE meter"
Waitms 100
If Pind.2 = 1 And Pind.0 = 0 And Pind.1 = 0 Then
Cls
Start Adc
Do
W = Getadc(1)
Waitms 100
Locate 1 , 1
S = W / 1023
S = 0.63212 - S
Strf = Fusing(s , "###.###")
Lcd "Vt0=" ; Strf ; " "
S = 646.6593317 - W
Locate 2 , 1
Strf = Fusing(s , "###.###")
Lcd "Vt1=" ; Strf ; " "
If Pind.2 = 0 Then
Cls
Lcd "ok!"
Waitms 1000
Goto Begin
End If
Loop
End If
Begin:
'lcd "modified by wtyw"
Do
If Pind.2 = 1 Then
If Firstrunce = 1 Or Firstruncl = 0 Then
Firstrunce = 0
Cls
Locate 1 , 1
Lcd "CE Meter"
Disable Ovf0
Disable Ovf1
Enable Int1
Enable Ovf2
Waitms 1000
End If
Do
If Ifready = 1 Then
Ifready = 0
If Pind.2 = 1 Then
Clx = Cct / 3350 ' 经3k5充电实测3350R
Else
Clx = Cct / 193.8 '并上200R电阻,测得193.8R
End If
Locate 1 , 1
Strclx = Str(cct)
Lcd "Tcex=" ; Strclx ; "us "
Locate 2 , 1
Strclx = Fusing(clx , "###.###")
Lcd "CEx=" ; Strclx ; "uF "
Portc.4 = 0
Ct = 0
Tcnt2 = 0
Start Timer2
End If
If Pind.2 = 0 And Pind.0 = 0 And Pind.1 = 0 Then
Firstruncl = 1
Goto Forcl
End If
Loop
Else
Forcl:
Disable Ovf2
Disable Int1
If Firstruncl = 1 Then
Cls
Locate 1 , 1
Lcd "C&L Meter"
Waitms 1000
Enable Ovf0
Enable Ovf1
Tcnt0 = 6
Counter1 = 0
Start Timer0
Start Counter1
Firstruncl = 0
'测量处理初始频率
W1:
If Pind.0 = 1 Then
Locate 1 , 1
Lcd "Please press dow"
Lowerline
Lcd "n key S2 "
Goto W1
Else
If Pind.1 = 0 Then
Locate 1 , 1
Lcd "You can not pres"
Lowerline
Lcd "s S3 down now "
Goto W1
Else
Rf0:
Cls
Lcd "Now Testing F0"
Waitms 2000
F0 = F
If F0 <= 430 Then
Goto Rf0
End If
Strf = Str(f)
Cls
Lf = Len(strf)
If Lf >= 4 Then
Lf = Lf - 3
Strf = Mid(strf , 1 , Lf) + "." + Right(strf , 3) + "KHz"
Else
Strf = Strf + "Hz"
End If
Lcd "F0=" ; Strf
Waitms 1000
End If
End If
'测量处理加入标准电容后频率
W2:
If Pind.1 = 1 Then
Locate 1 , 1
Lcd "Please press dow"
Lowerline
Lcd "n key S3 "
Goto W2
Else
If Pind.0 = 1 Then
Locate 1 , 1
Lcd "You can not pres"
Lowerline
Lcd "s S2 up now "
Goto W2
Else
Rf1:
Cls
Lcd "Now Testing F1"
Waitms 2000
F1 = F
If F1 <= 350 Then
Goto Rf1
End If
Strf = Str(f)
Cls
Lf = Len(strf)
If Lf >= 4 Then
Lf = Lf - 3
Strf = Mid(strf , 1 , Lf) + "." + Right(strf , 3) + "KHz"
Else
Strf = Strf + "Hz"
End If
Lcd "F1=" ; Strf
Waitms 1000
End If
End If
'数据处理并显示
C0 = F0 / F1
C0 = C0 * C0
C0 = C0 - 1
C0 = 390 / C0 '标准云母电容390pf
Strclx = Fusing(c0 , "###.###")
Cls
Lcd "C0=" ; Strclx ; "pF"
L0 = 39.4784176 * F0
L0 = L0 * F0
L0 = L0 * C0
L0 = 1000000000000000000 / L0 'uH
Strf = Fusing(l0 , "###.###")
Locate 2 , 1
Lcd "L0=" ; Strf ; "uH"
End If
'开始测量
Waitms 2000
F2 = F
Strf = Str(f2)
Lf = Len(strf)
If Lf >= 4 Then
Lf = Lf - 3
Strf = Mid(strf , 1 , Lf) + "." + Right(strf , 3) + "KHz"
Else
Strf = Strf + "Hz"
End If
Cls
Lcd "Fx=" ; Strf
Locate 2 , 1
Lcd " "
Locate 2 , 1
If Pind.1 = 0 Then '接入标准电容
Clx = F1 / F2
Else
Clx = F0 / F2
End If
Clx = Clx * Clx
Clx = Clx - 1
If Pind.0 = 0 Then
If Pind.1 = 0 Then
C0 = C0 + 390
Clx = Clx * C0 '标准云母电容390pf
C0 = C0 - 390
Else
Clx = Clx * C0
End If
Strclx = Fusing(clx , "###.###")
Lf = Len(strclx)
If Lf < 8 Then
Lcd "Cx=" ; Strclx ; "pF"
Elseif Lf >= 8 And Lf < 12 Then
Clx = Clx / 1000
Strclx = Fusing(clx , "###.###")
Lcd "Cx=" ; Strclx ; "nF"
Elseif Lf >= 12 Then
Clx = Clx / 1000000
Strclx = Fusing(clx , "###.###")
Lcd "Cx=" ; Strclx ; "uF"
End If
Else
Clx = Clx * L0
Strclx = Fusing(clx , "###.###")
Lf = Len(strclx)
If Lf < 8 Then
Lcd "Lx=" ; Strclx ; "uH"
Elseif Lf >= 8 And Lf < 12 Then
Clx = Clx / 1000
Strclx = Fusing(clx , "###.###")
Lcd "Lx=" ; Strclx ; "mH"
Elseif Lf >= 12 Then
Clx = Clx / 1000000
Strclx = Fusing(clx , "###.###")
Lcd "Lx=" ; Strclx ; "H"
End If
End If
End If
Loop
Over0:
Tcnt0 = 6
Incr T0
If T0 = 125 Then
Stop Counter1
F = T1 * 65535
F = F + Counter1
Counter1 = 0
T0 = 0
T1 = 0
Start Counter1
End If
Return
Over1:
Incr T1
Return
Over2:
Incr Ct
Return
In1:
Stop Timer2
Cct = Ct * 256
Cct = Cct + Tcnt2
While Pind.4 = 1
Portc.4 = 1
Wend
Ifready = 1
Return |
阿莫论坛20周年了!感谢大家的支持与爱护!!
一只鸟敢站在脆弱的枝条上歇脚,它依仗的不是枝条不会断,而是自己有翅膀,会飞。
|


 发表于 2010-3-12 20:01:51